Wednesday, April 21, 2010
Project: Grenadier Dragon Lords Red Dragon Progress I
Here is the old girl fully assembled with its first coat of primer.
One of the interesting points about this project was the construction sequence. As can be seen in the photo, this dragon has very large wings. And, being molded in lead alloy, they are also consequently heavy. Therefore, it took quite a bit more work to assemble this model than I had initially expected.
As usual I used 5-minute epoxy during the assembly process. Unfortunately, I did not have anything appropriate to prop up the wings while the epoxy cured, so I physically had to sit and hold the wings together while the epoxy cured. I had attempted to time the process, so I wouldn't have to hold them together for the whole 5 minutes, but even after the epoxy's "working time" expired, I had to continue to hold the wings for an extended period of time until the epoxy cured enough on its own. After that, the rest of the assembly process was trivial.
The figure was mounted on a plastic 50mm round base sourced from EM-4. They come in a bag of 5 for £1.50, not bad in this era of eCommerce and cheap shipping from the UK Royal Post. This base roughly coincides with a Large-sized Red Dragon by D&D 3/3.5/Pathfinder rules.
Next up will be the first basecoat. Thanks to the white primer, a coat of Citadel's Blood Red should produce a brilliant red color.
Tuesday, April 20, 2010
Project: 1/48 SU-122
The SU-122 was designed in response to the use of self-propelled assault guns by the German Army in WWII. Vehicles like the StuG III were designed to provide direct-fire artillery support to infantry troops on the battlefield, and be able to resist anti-tank weapons of the time. Based on the proven T-34 chassis the SU-122 (designation refers to the caliber of cannon used, in this case a 122mm howitzer) was more powerful than its German counterparts, able to throw a much larger shell.
Tamiya has followed up on their T-34 kit with this SU-122, and it's definitely a nice model. After working on a number of complex builds using after-market parts. I intend for this to be an "Out of the Box" build: simple and not encumbered by large numbers of after-market parts (in fact, I'll be building the model unmodified, with perhaps a bit of stowage). Expect some updates soon.
Saturday, April 17, 2010
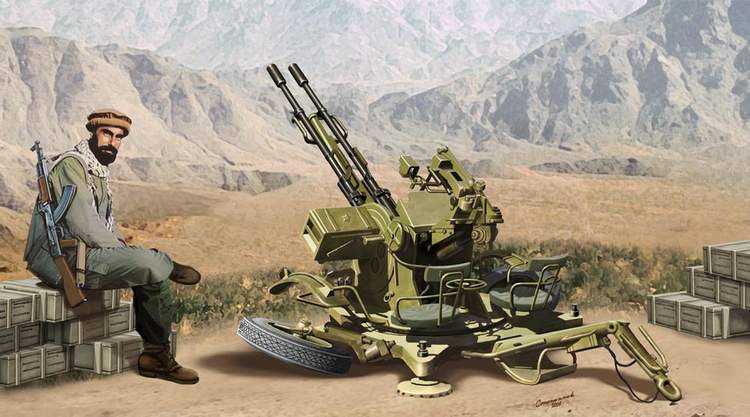
Project: 1/48 ACE ZU-23-2
One of the results of the thawing of the Cold War and liberalization of the economies of Eastern Europe is it allowed a lot of entrepreneurial-ism, which has been nothing but good for model builders. Hailing out of Kiev, Ukraine, ACE models has for several years concentrated on manufacturing small scale (1/72) armor kits and the like. Using limited run plastic injection molding technology, the ACE kits were always for more experienced modelers, and a little on the rough side. That being said, they also manufactured kits not produced anywhere else before or since, mainly concentrating on Eastern European designs, with a smattering of western designs as well.
The ZU-23-2 (kit # 48101) is ACE's first foray into the world of 1/48 scale modeling. I have to say, its a pretty nice kit, and much better than my memories of their older 1/72 scale kits.
The ZU-23-2 was one of the standard Soviet light anti-aircraft cannons, and is still in use today with a number of operators. Firing a 23mm shell, it is designed to be a more potent successor to the ZPU system (which mounted 14.5mm machine guns). Although lacking many of the modern aiming aids such as radar direction, it is simple, easy to use, and useful against both aerial targets (especially helicopters) and ground targets.
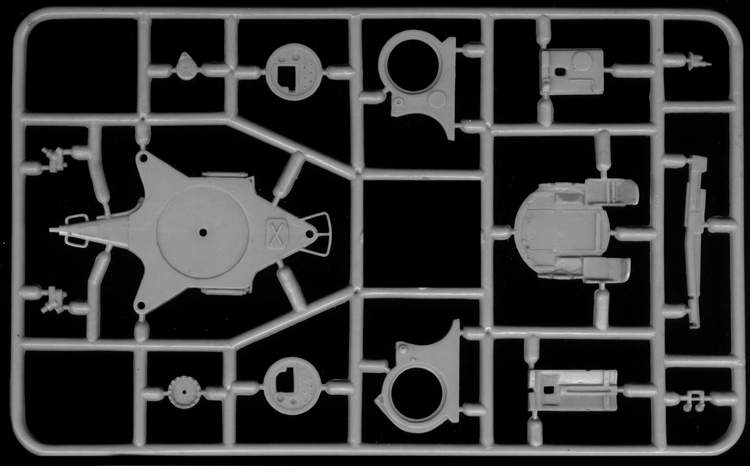
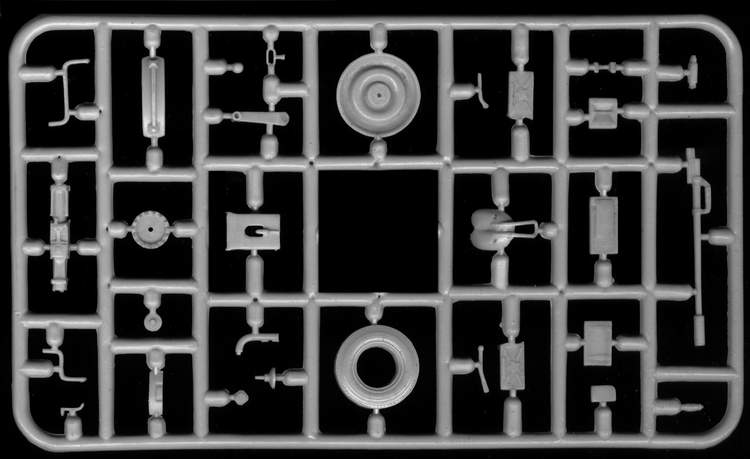
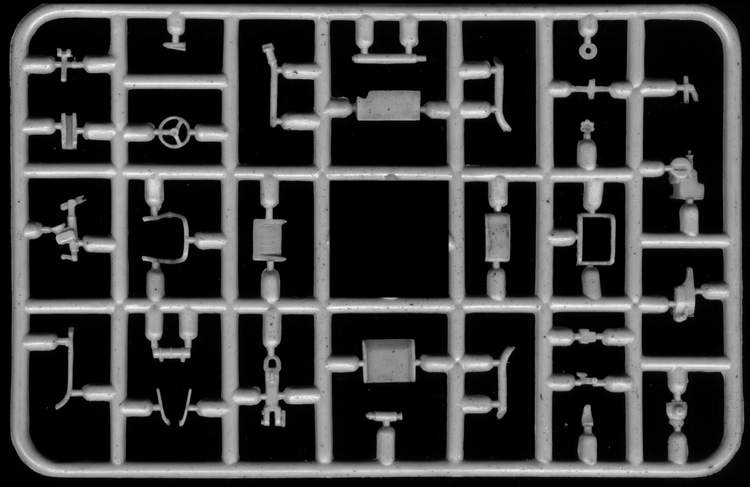
As can be seen from the sprue shots (these are taken from ACE's website, by the way), the kit includes 4 sprues, with 2 identical. The quality of the moldings are very good, and while some of the parts still have thick gates to be removed, the quality and finesse of the parts are better than older kits.
I have to admit, one of the reasons I bought this kit was to encourage ACE to do more in this scale. With a grand total of 2 different model kits of modern molding quality currently in plastic (unless you include the old Tamiya/Academy/Arii battery powered carpet crawlers, or the equally dreadful and not especially accurate Kitech/Zhengdefu kits), there's not a lot that can go with this kit, unless you resort to resin. But still, it's a very nice kit, and looks like it will be a fun project.
The ZU-23-2 (kit # 48101) is ACE's first foray into the world of 1/48 scale modeling. I have to say, its a pretty nice kit, and much better than my memories of their older 1/72 scale kits.
The ZU-23-2 was one of the standard Soviet light anti-aircraft cannons, and is still in use today with a number of operators. Firing a 23mm shell, it is designed to be a more potent successor to the ZPU system (which mounted 14.5mm machine guns). Although lacking many of the modern aiming aids such as radar direction, it is simple, easy to use, and useful against both aerial targets (especially helicopters) and ground targets.
As can be seen from the sprue shots (these are taken from ACE's website, by the way), the kit includes 4 sprues, with 2 identical. The quality of the moldings are very good, and while some of the parts still have thick gates to be removed, the quality and finesse of the parts are better than older kits.
I have to admit, one of the reasons I bought this kit was to encourage ACE to do more in this scale. With a grand total of 2 different model kits of modern molding quality currently in plastic (unless you include the old Tamiya/Academy/Arii battery powered carpet crawlers, or the equally dreadful and not especially accurate Kitech/Zhengdefu kits), there's not a lot that can go with this kit, unless you resort to resin. But still, it's a very nice kit, and looks like it will be a fun project.
Monday, April 12, 2010
Project: Grenadier Dragon Lords Red Dragon
Over the course of this blog, I've come to the realization that it's mostly about model building, and not much about minis. So on that note I offer the first project focused on minis. And it is a classic.
Grenadier was one of the older, more venerable figure manufacturers in the realm of fantasy and SF gaming. Although they had a historical line, they are much more well known for the fantasy and licensed properties they produced miniatures for. Although now gone, for many gamers of D&D and AD&D in the late '70s and '80s, Grenadier was an important foundation to any collection (at least here in the US).
Around 1984, Grenadier started the "Dragon of the Month" series, producing a single dragon every month for a year. This included the 5 Chromatic dragons (White, Red, Blue, Green, Black), the 5 Metallic Dragons (Brass, Bronze, Copper, Gold, Silver), the Platinum Dragon, and the Spectral Dragon (aka Tiamat of AD&D fame). Each boxed set came with the dragon in question, as well as a small pedistal with a plastic gem. When complete, the pedestals formed a ring of gems, one for each color. It was a fun and cool accessory, and created a reason to collect them all.
The Dragons of the Month series, by modern standards, is a little primitive in sculpting. There are certainly better, more detailed dragons on the market (including Grenadier's second series: "Dragons of the Month II"), but in my opinion, a lot of the old Grenadier miniatures have a certain charm, and I've taken it upon myself to collect a lot of these old dragons, for use in either D&D or just to simply have.
Here is the dragon before assembly. This model was molded in lead, rather than the pewter alloys a lot of fantasy figures are currently manufactured in. This means the figure is rather heavy but fairly soft and malleable. That being said, epoxy will be used exclusively in the construction of this figure.
Another property of Grenadier's alloys is that they tend to have a fair bit of flash. With lead alloys this is not as much a problem as with pewter, as the alloy files much easier, but nonetheless it will require quite a bit more clean-up compared to many modern figures. Looking at the pedestal, there is quite a bit of flash around it (indeed, all of the figures I've acquired so far have flash issues).
One interesting note: the Grenadier molds are now the property of Mirliton Miniatures of Italy. As far as I know, only one dragon from the orginal Dragon Lords line has been released by them: the Brass. However, most of the Dragon Lords II line is available, though of course without the accessories in the original Grenadier boxes.
Tuesday, April 6, 2010
Project: 1/48 Panzer III Ausf.M Progress III
The Panzer IIIM is nearing completion. Here not only have I applied the basecoat of paint, but also the camouflage scheme. This was done using the fine tip and needle in my Paasche VLS double action airbrush. With thinned Tamiya Olive Green XF-58 paint (the basecoat was again Tamiya Dark Yellow XF-60). With the needle pulled back only slightly, and with the paint thinned to a skim milk-like consistency, it is possible to get pencil thin lines with some skill and precision. Unfortunately, I think I needed to thin the paint a bit more, as there was a slight bit of splatter, but given these tanks were painted by the crew with whatever skills they were able to bring, neatness was not always the norm either.
The Echelon Fine Decals have been applied, and these are definitely some of the finest on the market. The decals were silk screened, rather than printed via a lithograph process or on a color printer. This means they are not only very rich and dense in colors (such as they are, here only 2 -- black and white), but also a pleasure to work with. They are also very thin, meaning there is less work I need to do to make them look like something other than a decal! I used my standard process for applying these decals: the model was first airbrushed in Future Floor Acrylic Finish (using the coarse tip and needle, and the Future unthinned), then the decals applied with a little Solvaset to make sure they snuggle down onto the model. Afterward, a second coat of Future seals the work.
The suspension components on the tracks have also been painted, again using the fine tip in my airbrush. This can be a tedious process, but the results speak for themselves. I still need to paint the front half of the road wheels and return rollers, but so far I am pleased with how they came out. Interestingly, when highly thinned, Tamiya paints take on a semi-gloss aspect. Not that it really matters all that much...
The next step in this process is to allow the clearcoat to dry thoroughly (usually a process of several days; for Future I use the old technique of waiting until it doesn't smell of Future anymore!), and a dullcoat likely using Polly Scale Acrylic clear flat, with a little Tamiya Flat Base X-21 mixed in (note: it always bears repeating that X-21 is not a clear flat, but a paint additive to make dull paints!).
The Echelon Fine Decals have been applied, and these are definitely some of the finest on the market. The decals were silk screened, rather than printed via a lithograph process or on a color printer. This means they are not only very rich and dense in colors (such as they are, here only 2 -- black and white), but also a pleasure to work with. They are also very thin, meaning there is less work I need to do to make them look like something other than a decal! I used my standard process for applying these decals: the model was first airbrushed in Future Floor Acrylic Finish (using the coarse tip and needle, and the Future unthinned), then the decals applied with a little Solvaset to make sure they snuggle down onto the model. Afterward, a second coat of Future seals the work.
The suspension components on the tracks have also been painted, again using the fine tip in my airbrush. This can be a tedious process, but the results speak for themselves. I still need to paint the front half of the road wheels and return rollers, but so far I am pleased with how they came out. Interestingly, when highly thinned, Tamiya paints take on a semi-gloss aspect. Not that it really matters all that much...
The next step in this process is to allow the clearcoat to dry thoroughly (usually a process of several days; for Future I use the old technique of waiting until it doesn't smell of Future anymore!), and a dullcoat likely using Polly Scale Acrylic clear flat, with a little Tamiya Flat Base X-21 mixed in (note: it always bears repeating that X-21 is not a clear flat, but a paint additive to make dull paints!).
Friday, March 26, 2010
"The Stash"
One of the curious things about being a hobbyist (such as a model builder or a wargamer) is that over time one tends to collect a "stash" (or in wargaming circles, a lead pile). This is mainly due to the phenomenon of having more money than time to build, coupled with ambition. Thus I thought it would be fun to document my "stash" and see if it grows smaller over time, or larger (far more likely).
The picture above is of an old bookcase stuffed with kits. It has become such that the overflow is now resting on the shade of a lamp! This is all in my basement, where level of clutter is irrelevant to the rest of the family (except perhaps as a fire hazard). This is for the most part the "1/35" stash, as the main constituents are 1/35 scale models. There a a few ship models that managed to get in there somehow. As can be seen my stash has a fairly diverse subject matter, spanning from WWII to modern.
This second picture represents the other half of the stash. Here we have my collection of 1/48 scale models, as well as a couple aircraft kits and some SF stuff. The top shelf is mostly dedicated to wargames figures: in the collection you should be able to see both Warhammer Fantasy/40K items, some historicals, as well as a few figures where the primer is still curing. In the tool trays at the very back are plastic and metal bases, as well as my collection of unfinished 15mm figures. It's a large collection because 15mm is (for the most part) cheap. One thing to note is that the shelves with my model kits are double depth!
I cannot imagine how much money this investment represents, and I would probably be better of not calculating its worth. That being said, it is a hobby, and it brings me a certain measure of happiness. Thankfully I have a big basement (aka "The Man Cave"), and plenty of other corners to stash my stuff.
Friday, March 19, 2010
Project: 1/48 Panzer III Ausf.M Progress II
Made a little progress on the Panzer IIIM project. As can be seen here, the turret is complete in terms of construction. When mounting the main armament to the turret, Hauler fails to provide much of a mounting area, just a blank space behind where the mantlet goes. I can only assume that Hauler intends the builder to simply butt-glue the mantlet to the turret, but this creates unsightly gaps either on the top of the mounting, or below (depending on what elevation you desire). I resolved this by cutting the plastic mounting piece from the kit in half, and then gluing it into the space provided. Although not called out in the conversion's instructions, I assume this is what Hauler intended. Nonetheless, cutting the component along the seam lines means the cannon is super-elevated. Not really much of a problem as I rarely depict models in the act of an actual engagement, but I would have at least liked a choice.
The Panzer IIIM moved the headlights from the hull front to the fenders, as I had mentioned in my previous post. Hauler provides new mounts and headlights, but unfortunately, while removing one of the headlights, it promptly fell on the floor and disappeared! I can rarely get through a project without losing a piece or two, and for this one it was a headlight. Luckily Hauler provides the correct types as a separate set, so I promptly ordered a new set (which has not arrived yet).
The smoke grenade launchers on the side of the turret are also offered as a seperate upgrade kit for people building the Panzer IIIN (Tamiya doesn't provide these), or upgrading the IIIL for a Kursk era machine. Given that, I have some experience with these components, and I while I think Hauler puts out an excellent product, these components are not one of their best efforts in my opinion. The set does give you some variety, providing both loaded and expended launchers. Unfortunately, however, you only get 8 mortars, (you need to use 6), with 4 loaded, and 4 expended mortars. Again, it would have been nice to have a total of 12 mortars to depict a vehicle at full load out, or perhaps one that has already expended all of it's smoke grenades.
That, however, is a minor complaint compared to the photo-etch mounting brackets.The big problem here is that each smoke grenade is supposed to be angled slightly in order to clear it's neighbor. The photo-etch mounting bracket unfortunately lacks relief-etch fold lines to aid the modeler. This means that without special tools it is very hard to get a good fold, and really a special PE folding device is recommended. I don't have one of these, so I instead scribed the brass to provide a "weak" point to fold at. It wasn't entirely successful, and as a result, the bend is a little more sloppy than I would like. I'm going to have to live with it, but if Hauler happens to be reading, I highly reccomend adding relief-etch fold lines to these components!
The suspension has already been spray-painted black in preparation for further painting. Normally, I weather the tracks and then hand-paint the wheels. This time, however, I think I'll do things a little different and use the fine needle in my airbrush to spray them instead. Hopefully, with enough patience and skill, I can minimize over-spray on the tracks themselves.
Finally, with the suspension components fully assembled, I joined the lower and upper hulls permanently. On the Tamiya kits with metal hulls, this is usually facilitated by a pair of screws. I personally dislike this as again it reduced the number of options one can do with the kit. In the case of the Panzer III series kits, the mounting holes are covered by one of the transmission access hatch and one of the engine access hatches in the rear. Some other kits, however, have the mounting points through crew hatches and such. In many ways this reminds me of the early DML 1/72 scale kits, which similarly had cast metal components and screw together assembly. These compromises were made because the true purpose of the kits were for the collectible, pre-constructed and pre-painted market. This market for whatever reason values weight and metal as equaling quality, despite the fact that metal cannot hold fine detail as well as plastic. Unfortunately, it is one of the things we must live with, as the actual model-building market is of secondary importance.
I'm actually planning on painting the turret in short order, mainly so I can start applying decals. For some people, the decalling stage is a chore; for me, a good set of quality silk-screened decals are a pleasure, and one of my favorite aspects of this project.
Subscribe to:
Posts (Atom)